Let’s be honest. Kids’ clothes do not magically stay organized just because you buy cute bins.
I wish they did.
Between the shirts, pants, shoes, and all the little things kids somehow collect, keeping a child’s room organized can feel like a full-time job. And when you live in an older home with awkward spaces, it can feel even harder.
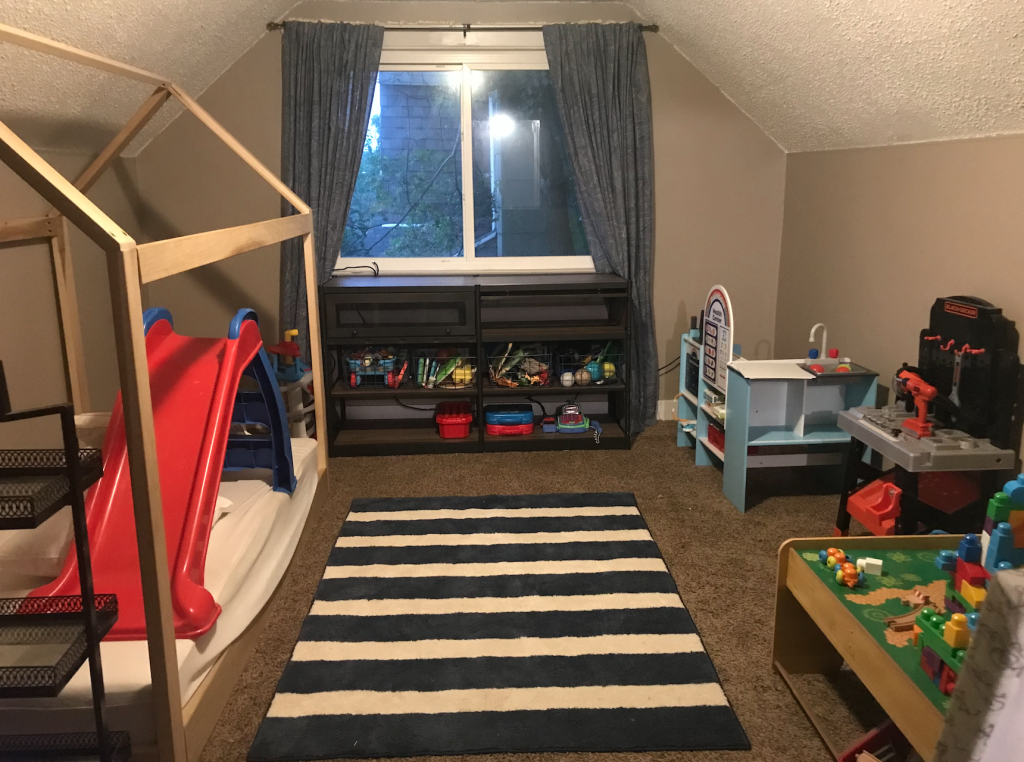
That was the problem I ran into when I moved my son into the biggest bedroom in our house. Giving him the larger room made sense for our family. We do not have a designated playroom, so I wanted him to have a bedroom that gave him space to sleep, play, and just be a kid.
But the closet?
The closet was basically giving us nothing. It had a sloped ceiling, was only about two feet deep, and was somewhere around three to five feet wide from wall to wall. I could have added a clothing rod, but because of the slope, it would have only given me a small amount of usable hanging space. The rest would have been dead space. And I did not need another awkward space in my house that looked like storage but did not actually help me store anything.
I needed a real solution.
I needed a place for all of his clothes, socks, underwear, pajamas, and shoes. Basically, I needed to create a closet because the room did not really come with one. So I built one using two IKEA Kallax units, scrap wood, pieces from an old toddler bed, and IKEA BESTÅ drawers for a window bench. Was it a perfect, professionally planned project with a detailed cut list?
Absolutely not.
Was it exactly what this room needed?
Yes.
The Real Problem Was Function
This project was not just about making the room look cute. The real problem was that the room had potential, but it did not have the function we needed. That is something I run into a lot in our home. Older homes have so much character, but they do not always have the storage modern families need. The rooms can be charming, but the closets are usually small, awkward, or just not enough. This room was a perfect example.
It was the biggest bedroom, which made it the best room for my son. But the closet was not going to work for all of his everyday things. I did not want his clothes living out of baskets forever, and I did not want to keep fighting with a closet that was never going to give me what I needed. So instead of forcing the original closet to work, I started thinking about what the room actually needed.
That is when I kept coming back to the idea of a window seat with wardrobes on both sides.
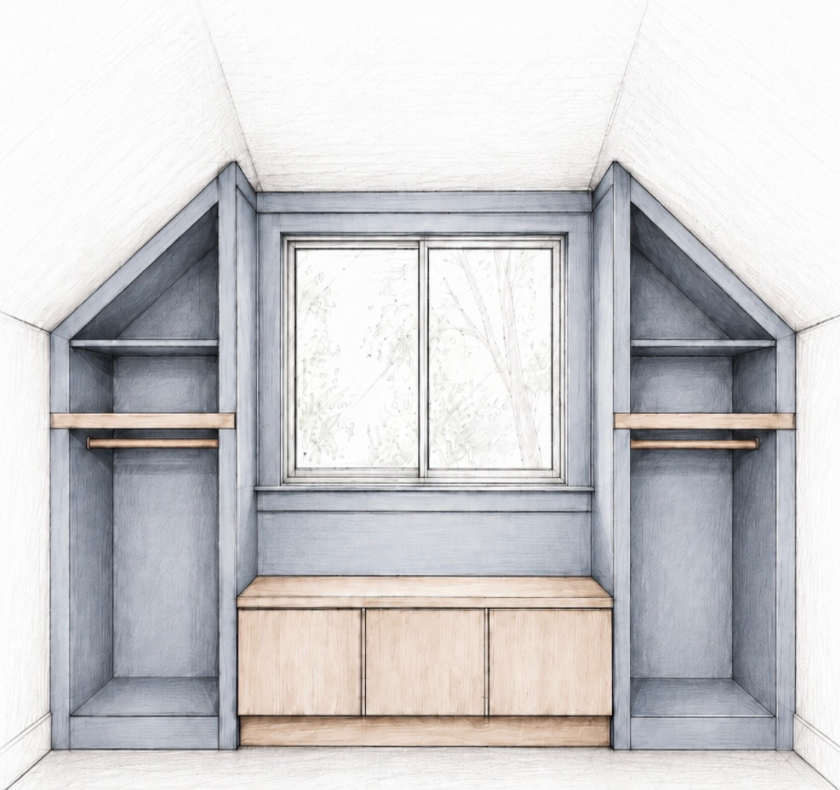
A window seat felt like one of those details that could take the room from “we made it work” to “this feels special.” It would add storage, create a cozy moment, and make the room feel more custom without me paying for a true custom-built-in.
That was the vision. The budget, however, was not giving “custom built-in.” So I had to get creative.
I Started With What I Had
Before I bought anything new, I looked around at what I already had.
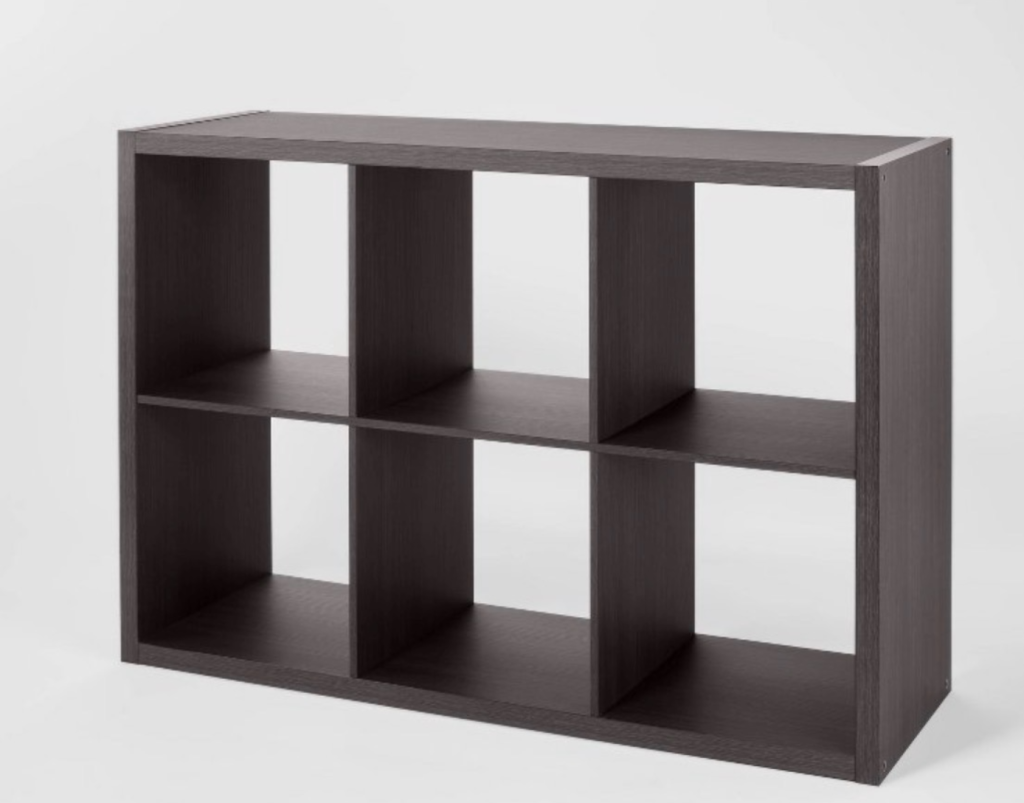
I had two IKEA Kallax cube shelf units that I had planned to donate. They were the six-cubby units that fit 13-inch bins. I also had scrap plywood from previous projects and an old toddler house bed that my son no longer used. That toddler bed ended up being a huge part of this project. It was made from real wood, so I was able to take it apart and reuse the wood for framing and trim details.
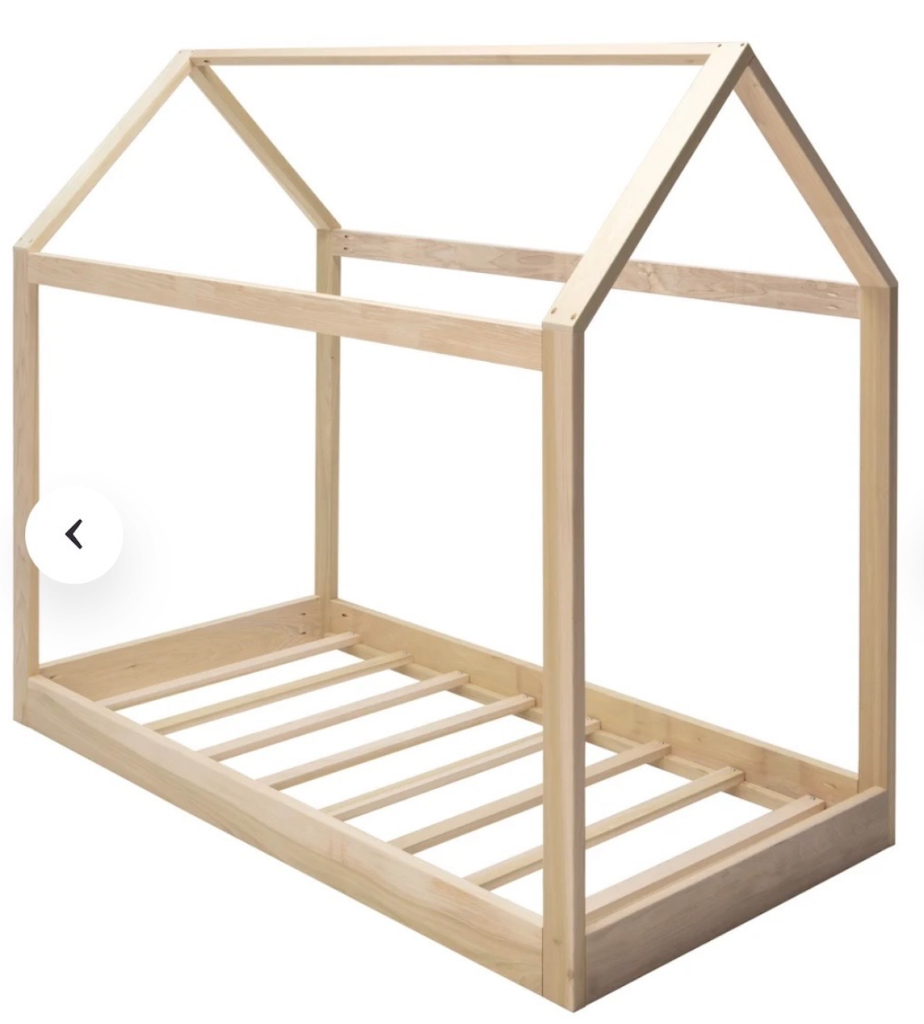
That is important to mention because not every toddler house bed is made the same way. If you are thinking about repurposing furniture, make sure the material is strong enough and safe to reuse. For me, that old bed became building material. And honestly, that is one of my favorite parts of this project. Something that could have been thrown away or forgotten became part of a brand-new storage solution for my son’s room.
What This Project Cost
This project cost me about $300 out of pocket.
That covered the things I did not already have, mostly the IKEA BESTÅ system for the window bench, some trim, and paint. Everything else was either repurposed from old furniture or left over from previous projects. Now, $300 is still a large amount of money. I am not going to act like it is not. But for a wall of built-in wardrobes, a window bench, drawers, and a full closet solution, $300 is a lot less than what I would have spent buying something brand new or paying someone to build a custom piece.
This is why I always come back to the same idea in my home:
You do not always have to start from zero.
Sometimes the first step is not going shopping. Sometimes the first step is looking at what you already have and asking, “Could this become something else?”
What I Used
Here are the main supplies I used for this project:
- Two IKEA Kallax cube shelf units
- An old wooden toddler house bed
- 2×4 boards
- Primed 1×3 MDF
- Primed 1×4 MDF
- 3/8-inch pine boards
- 5mm plywood
- IKEA BESTÅ drawer units
- Primer
- One gallon of discounted paint
- Screws and nails
The tools I used:
- Drill
- Screwdriver
- Kreg pocket hole jig
- Circular saw
- Hand saw (optional)
- Miter saw.
How I Built It
I started by taking the Kallax units apart until I had just the outer frames. The shelves I removed from the Kallax units did not go to waste. I reused them later inside the wardrobes.
Then I built a 2×4 base for the units to sit on. This gave the wardrobes a stronger foundation and helped everything feel more like a built-in instead of furniture sitting against a wall.
From there, I used pieces from the toddler bed to build out the frame. I also added scrap wood in places where I needed extra support or something to nail trim into.
Once the frames were built, I attached the Kallax units to the base and started closing everything in with plywood and reused shelf pieces. This was the point where the project started to look less like old cube shelves and random wood and more like an actual wardrobe. And that is always the part of a project that keeps me going.
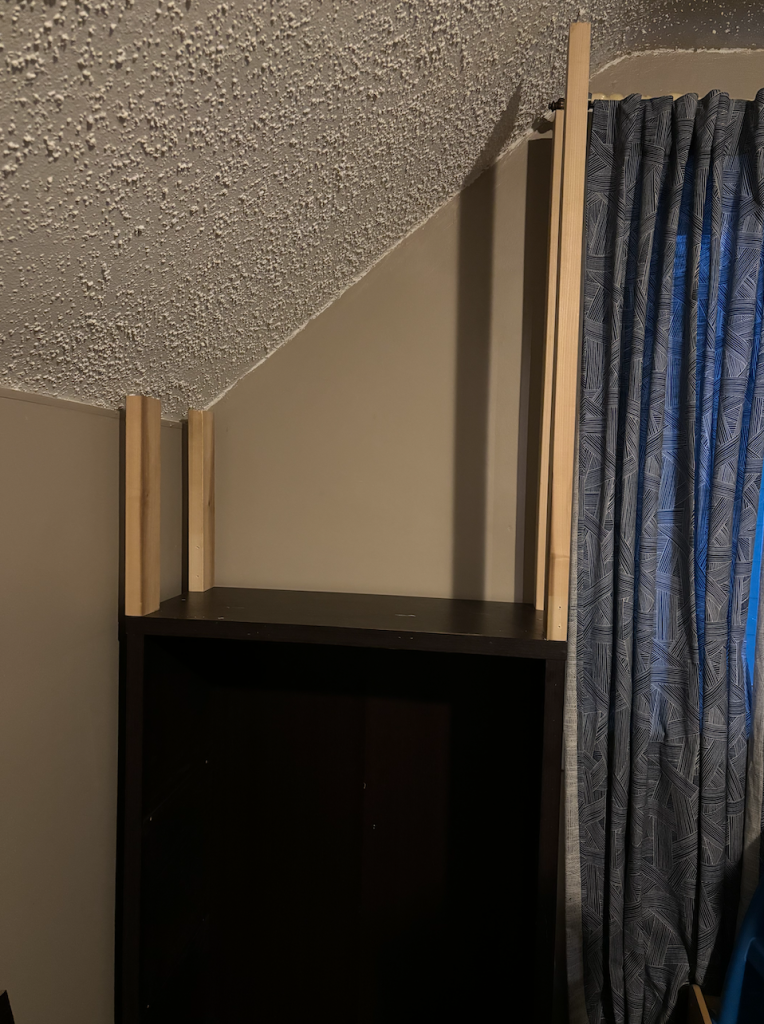
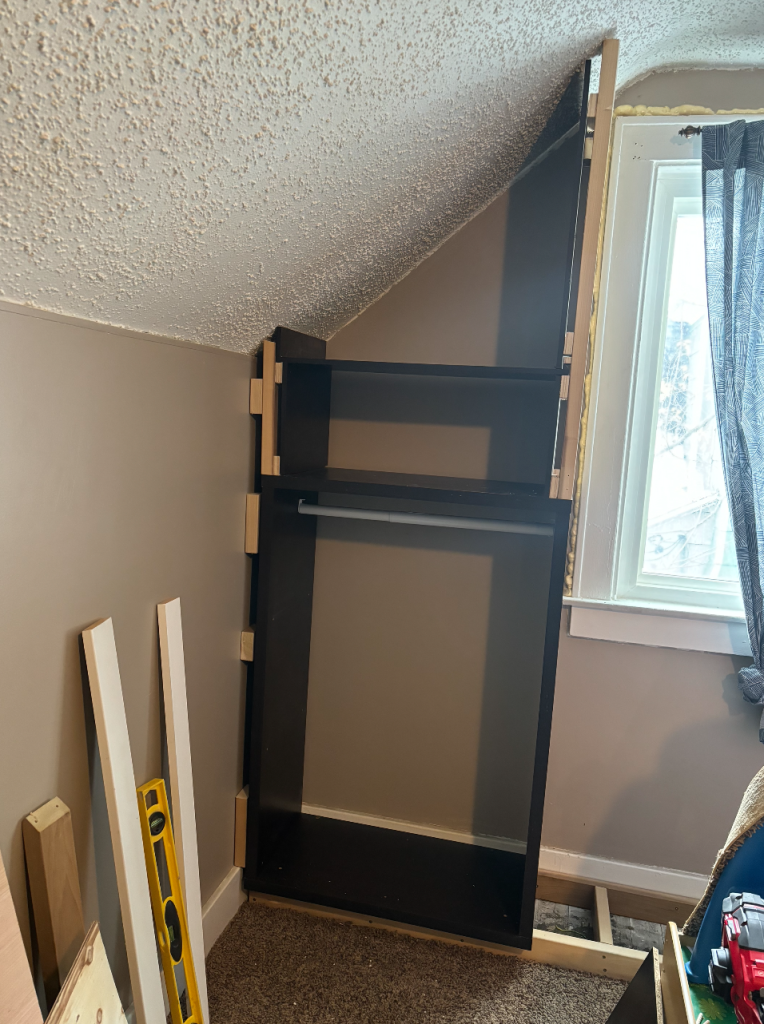
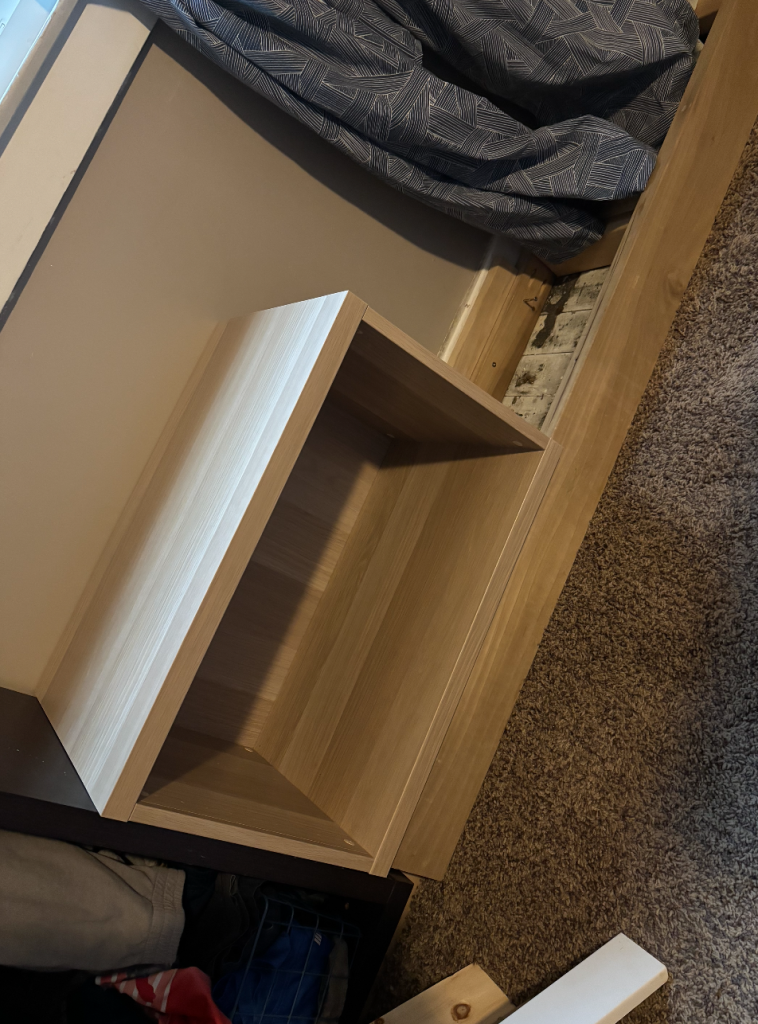
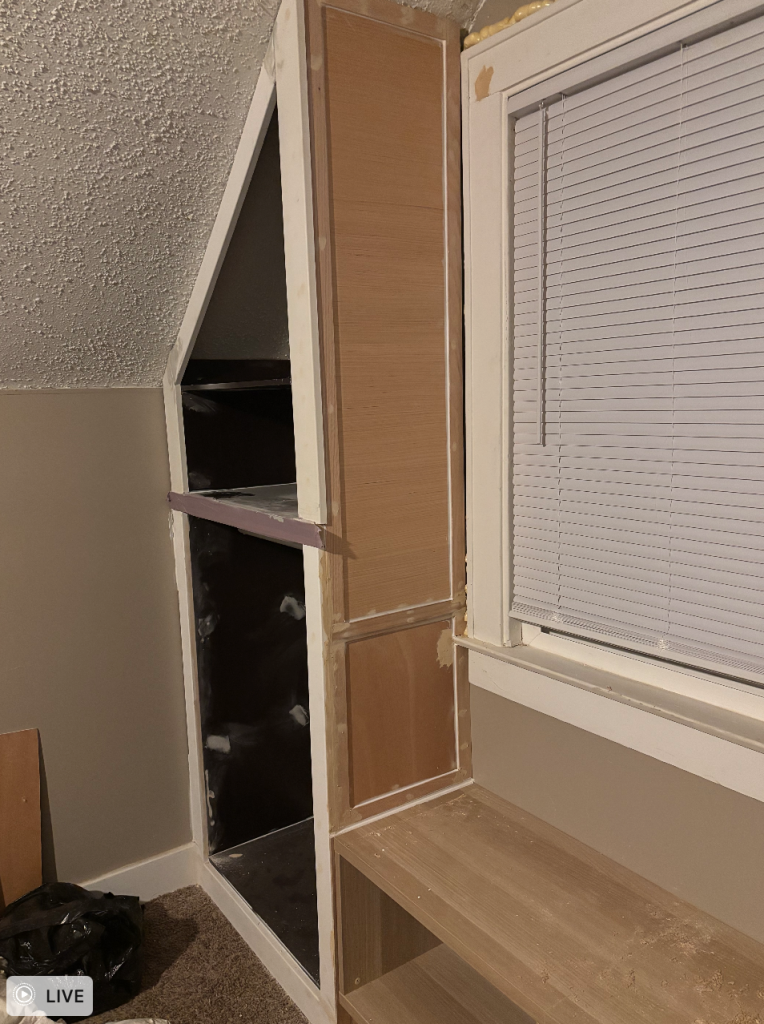
This is the stage where everything looked questionable. I stood there looking at plywood, screws, gaps, and random pieces of wood, wondering if I had made a mistake. After a few more pieces went up, I could finally see it coming together.
A Safety Note
Because this wardrobe is in a child’s room, safety is very important. Every home, wall, and project is different. If you build something like this, make sure your wardrobe or built-in is secured in a way that is safe for your space. That may mean securing it to studs, using the proper wall anchors, building a strong base, or using another method that makes sense for your home. I built my wardrobe onto a sturdy 2×4 base and secured it in a way that worked for my room, but you should always make sure tall furniture and built-ins are stable, secure, and safe, especially in a kid’s bedroom.
The Window Bench Made It Feel Custom
The window bench was the part that made this project feel less like storage and more like a real feature in the room. For the bench, I used three IKEA BESTÅ drawer units between the two wardrobes. This was the biggest expense of the project, and it was also the part that made the project take longer. The BESTÅ system comes in separate pieces, so I had to buy the frames, drawers, and drawer fronts separately.
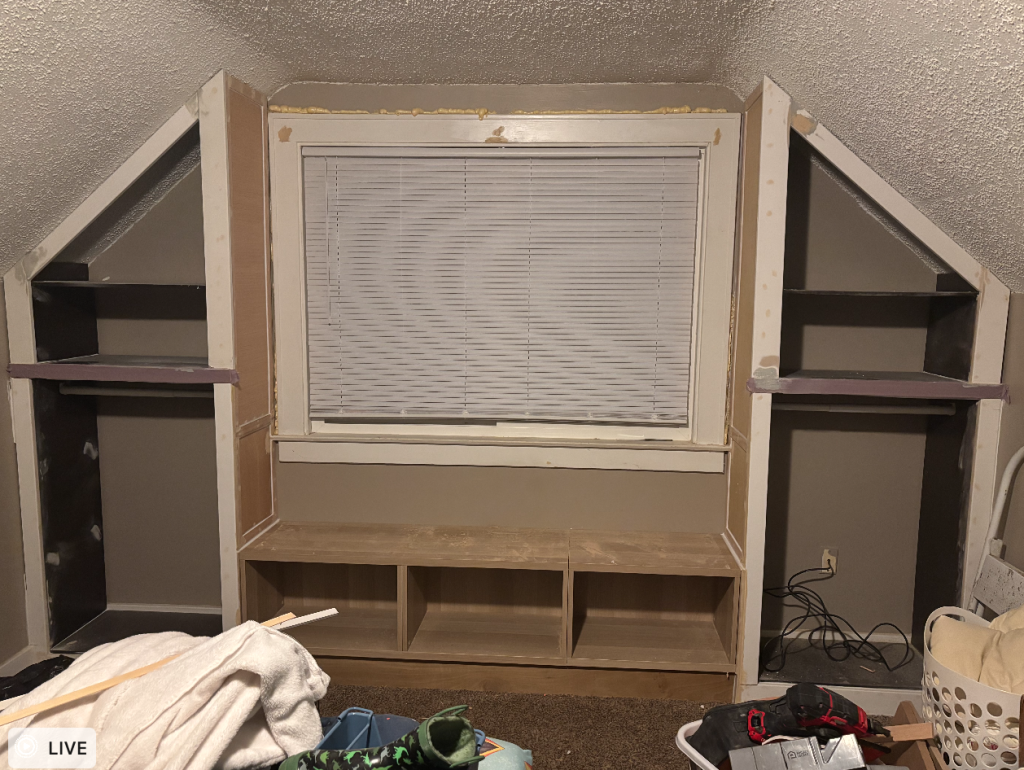
Some of the drawer fronts were out of stock for a couple of months, which meant the project had to happen in phases. And honestly, that is real life.
Sometimes you have the vision before you have the budget. Sometimes you have the budget before the store has the pieces in stock. Sometimes a project sits unfinished longer than you planned, and you just have to keep going when you can. This project did not happen overnight, but it got done.
My Favorite Unplanned Detail
One of my favorite parts of the wardrobe is the wood trim detail in the middle. And I did not plan it. That detail happened because I was trying to use as much wood from the toddler bed as possible. I had pieces available, so I worked them into the design. Once I saw it, I loved it. It added character and made the wardrobe feel more custom. It was one of those “make it work” moments that ended up making the project better.
That is something I think people overlook when they are working on their homes. Not every good design choice starts as a design choice. Sometimes it starts as a budget choice. Sometimes it starts as a problem. Sometimes it starts because you are trying not to waste what you already have. And then somehow, it becomes the thing you love most.
Painting the Wardrobe
For paint, I used a gallon of discounted paint from Lowe’s. It came from the section where they sell paint that was mixed incorrectly or returned. I cannot share the exact color because it was not a color I picked from a paint card. It was just one of those lucky finds that happened to work beautifully for the room.
Because part of this wardrobe was made from IKEA Kallax units, I had to prep the laminate surface really well before painting. I sanded the laminate areas, primed everything, and then painted. I used two coats of primer and two coats of paint.
If you have never painted laminate furniture before, do not skip the prep. Paint does not stick to laminate the same way it sticks to raw wood. Sanding and priming are what helped the paint actually adhere.
The Final Result
Now this wardrobe functions as my son’s closet.
It stores his clothes, socks, underwear, pajamas, and shoes. It gave us the storage that the original closet could not provide, and it made the room feel more intentional, custom, and complete. Looking at it now, you would never know it started with old Kallax units, scrap plywood, and pieces from a toddler bed.
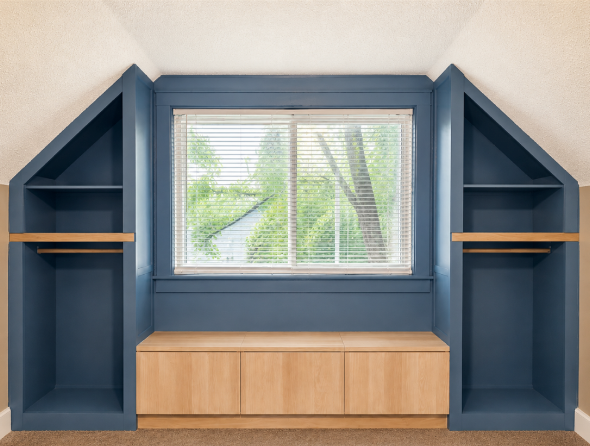
And that is the whole point.
This project is not just about a wardrobe.
It is about looking at an awkward space in your home and deciding it does not have to stay that way. It is about using what you already have before assuming you need to buy everything new. It is about making the home you live in right now work better for your real life.
Not someday.
Not when you have the perfect budget.
Not when every room can be professionally designed.
Right now, with what you have.
And every time I look at the wardrobe, I am reminded that a beautiful, functional home does not always come from spending more money. Sometimes it comes from seeing possibilities in what is already sitting in your house.
Leave a Reply